Jekyll... What It Is and How to make it Great for Portfolios
When I started my portfolio project, I wanted a simple yet powerful way to create and manage my content. That’s when I discovered Jekyll.
In this post, I will share with you how I use Jekyll to enhance the look and feel of my portfolio.
- What is Jekyll?
- Set up GitHub Pages with Jekyll
- Jekyll Basics
- Creating and Organizing Content
- Building and Testing Locally
- Deploying to GitHub Pages
- Conclusion and Next Steps

What is Jekyll?
Jekyll is a static site generator that turns plain text into beautiful websites. What made Jekyll even more appealing was its seamless integration with GitHub Pages. This combination offers several benefits:
-
Free hosting on GitHub
-
Version control for your website
-
Easy collaboration with others
-
 Automatic builds and deployments
 -
Ready-to-use themes
Set up GitHub Pages with Jekyll
To set up GitHub Pages with Jekyll, we need to do some preparation first. This preparation would be helpful for testing changes before pushing them live.
Install Git
Follow Set up Git to install Git on your computer locally.
Install VS Code (Optional if you have your own code editor)
Follow Download Visual Studio Code to install VS Code on your computer.
Install Jekyll
Follow Installation to install Ruby, Jekyll and Bundler on your system.
Ready to Set up
From my previous blog post, we created a repository analystjoey.github.io remotely in GitHub and commited an index.html as the portfolio first page.
Let’s continue!
-
Open VS Code.
-
Click File, then Open Folder… and open a location where you want to store the portfolio site’s source file. For example, I put them under
Documents/github.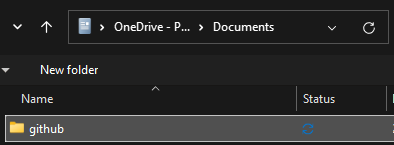
-
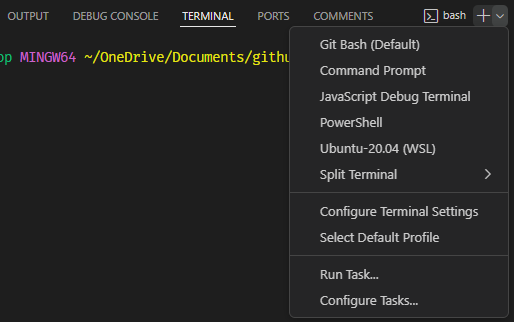
Click Terminal, then New Terminal. You should have Git Bash open. (If it is not bash, click the + to change to Git Bash).
-
In Git Bash, initialize a local Git repository
git init analystjoey.github.io -
Change to the repository directory.
cd analystjoey.github.io -
Create a folder called
docsand change directories to it.mkdir docs cd docs -
Create and checkout a new branch
gh-pages. This would be the branch to be used later to publish the portfolio.git checkout --orphan gh-pages -
Create a new Jekyll site. Ensure you have the
.at the end.jekyll new --skip-bundle . -
Open and edit the
Gemfile.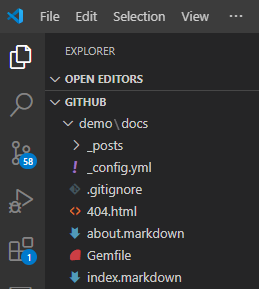
-
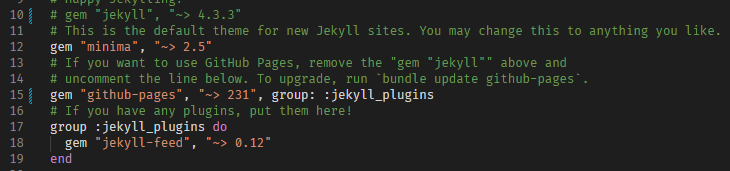
Locate the line starting with
gem "jekyll"(line 10) and the line starting with# gem "github-pages"(line 15).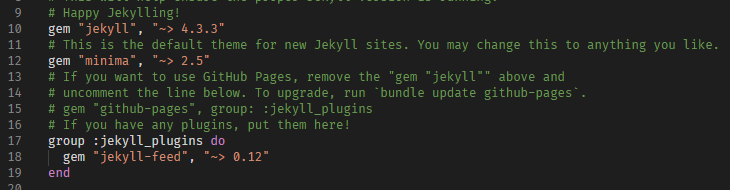
-
Add
#to comment out line 10. -
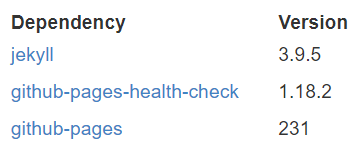
Note the Dependency Version of github-pages from GitHub Pages Dependency Version.
-
Remove
#in line 15 and edit this line as below, whereGITHUB-PAGES-VERSIONis 231 in this example.gem "github-pages", "~> GITHUB-PAGES-VERSION", group: :jekyll_plugins -
The updated file should be like this.
-
Save and close the
Gemfile. -
In Git Bash, run:
bundle install -
Open
.gitignoreand add this lineGemfile.lock. The file should look like this. Save and close this file.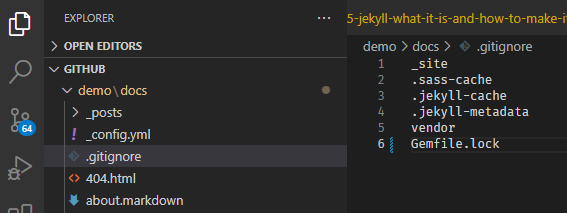
Congratulations! ![]() You have just set up Jekyll with your GitHub Pages.
You have just set up Jekyll with your GitHub Pages.
Jekyll Basics
To manage the content in our portfolio effectively, we should first understand Jekyll’s file structure. Here’s a simple breakdown:
-
_posts: to put our blog posts
-
_config.yml: Site configuration
-
404.html: the not found page; we can customize
-
about.markdown: the about page; we can customize
-
Gemfile: Jekyll configuration
-
index.markdown: the index page; we can customize
Jekyll has a powerful feature called front matter. It’s a section at the top of files where you can set variables for your content. For example:
---
layout: post
title: "My First Blog Post"
date: 2024-08-01
---
We may explore more about customization later. Let’s try to create some content.
Creating and Organizing Content
To write content like this blog post, we can rely on using Markdown. Markdown is easy to use and therefore we can focus on the words without worrying much about complex formatting. Jekyll automatically converts these to HTML pages.
-
Create a new file in the
_postsfolder with names2024-08-01-my-first-post.md. -
The
2024-08-01will appear as the blog date when we publish the post. -
Let’s put a simple message in this post. Close and save the file.
   ---
   layout: post
   title:  "Hello World!"
   ---
   Hello World!
Now that we have created our first blog post. Let’s build and test it!
Building and Testing Locally
Before pushing changes to GitHub, I always tested my site locally to catch and fix any issues before they went live. Here is how to do it.
-
In Git Bash, run
bundle exec jekyll serve -
If the server is running successfully, you should have output similar to this.
> Server address: http://127.0.0.1:4000/ > Server running... press ctrl-c to stop. -
If you do not receive this output, check if some files are missing. For example, a common issue is:
:37:in `require': cannot load such file -- webrick (LoadError) -
You may find how to solve issues by researching. For example, the above webrick issue is discussed and solved by running:
bundle add webrick -
Now run again
bundle exec jekyll serve -
Open a browser and go to
http://127.0.0.1:4000/. You should see your website now. Enjoy how minimal it is and see if your Hello World! post is there.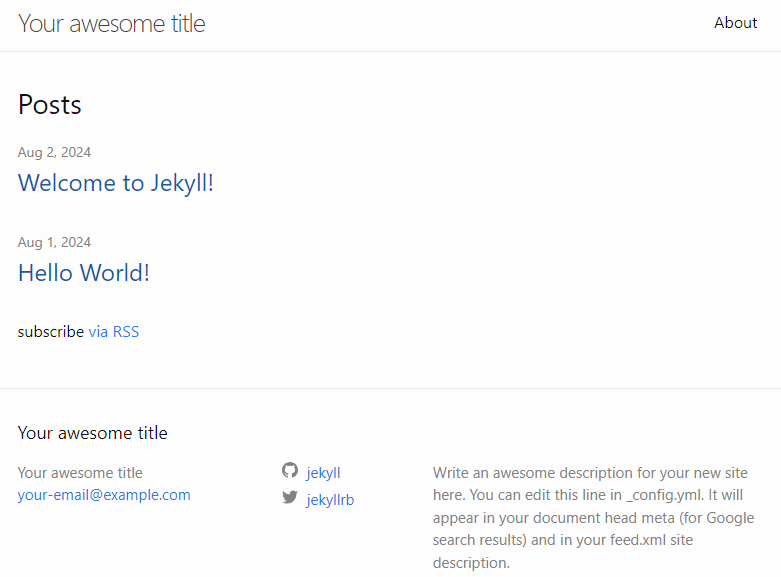
You may create more posts with the same YYYY-MM-DD-post-name.md naming convention and have some more fun with markdown.
Deploying to GitHub Pages
Deploying the Jekyll site to GitHub Pages was surprisingly easy.
-
Commit the changes
git add . git commit -m 'Initial GitHub pages site with Jekyll' -
Add your remote repository; USER is the username and REPOSITORY is the name of the repository
git remote add origin https://github.com/USER/REPOSITORY.gitFor example,
git remote add origin https://github.com/analystjoey/analystjoey.github.io.git -
Push to the gh-pages branch on GitHub
git push -u origin gh-pages -
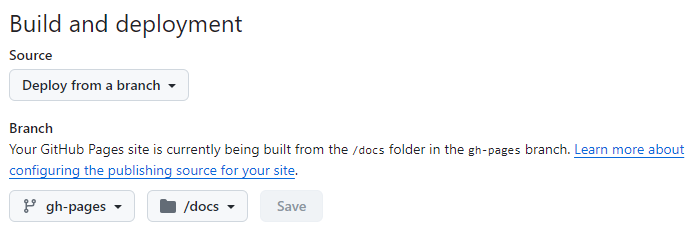
Ensure the publishing source is using the gh-pages branch.
- Go to the analystjoey.github.io repository on GitHub
- Click Settings tab
- Click Pages on the left
- Under Build and deployment, check that the Branch is gh-pages and docs
-
Click the Actions tab and wait for a success green tick for deployment.
-
Check your live site at analystjoey.github.io.
Congratulations! ![]() GitHub Pages has automatically built and deployed the site. Within minutes, our changes were live!
GitHub Pages has automatically built and deployed the site. Within minutes, our changes were live!
Conclusion and Next Steps
Setting up a website with Jekyll and GitHub Pages has been a rewarding experience. It’s given me a powerful platform to share my thoughts and projects with the world. (and YOU!)
For topic coming I will cover:
- how to customize the portfolio with a theme
- how to customize within a theme
- some markdown tips
If you’re interested in trying this yourself, don’t worry and try it. Remember, the key to success is patience and persistence. Happy coding!